Showing posts with label DIY. Show all posts

Tuesday, April 29, 2014

Quick Skirt Projects

Hello! I have been working on a lot of things. Sorry for not posting much lately. Many new jewelry designs and even more daydreams of future projects. Updates soon, I promise.

I am planning some steampunk costumes with a friend and it has inspired a whole wardrobe of projects to DIY. I will share the results and tutorial references for you to try yourself. I have a lot of inspirations collected on Pinterest.

http://www.pinterest.com/lady_laceration/steampunk/

I have been daydreaming of making a full costume for quite a few years now, I am finally getting around to it. It helps to have a friend to work on it with, also helps that my friend is a model so photo shoot in the future! I have an extra sewing machine so we can work at the same time, help each other and discuss patterns and alterations. :D

I did a quick sewing project with my friend Creative Creature. She made a tutu type layered skirt they has a red t shirt for a waistband and lining. The top fabric is some spider web printed gauzy fabric.


The one I made is another t shirt skirt with an elastic waistband. So comfy.


I love upcycling and reusing t shirts to make cozy clothes that breathe. Please share your t shirt projects in the comments!


- Posted using BlogPress from my iPhone

Monday, January 13, 2014

Jewelry Display

DIY Table Frame Display


Supplies:

Wooden frames, drill and bits, safety glasses, cardboard box, fancy nobs (drawer), fabric, burlap (for earring frame), hot glue gun, craft sticks, pencil and ruler.

These are the supplies that I used. When it comes to anything DIY, use what you already have or substitute where needed. :)  Everything pictured I bought at Michaels. The frames were 65% off and the nobs were found in a bin at $1.50 each! For my this project didn't cost much and has a great look. 


Necklace Frame


First take apart your frame. Measure and mark where you want your nobs to go. I put mine in a straight row, on a wider frame it would look interesting if the nobs had a varied placement. Wear you safety glasses. Using a drill bit the same size as the threaded part of the nob, drill. I put my frame on a thick cardboard box when drilling so that I wouldn't drill into my table.


Place your nobs into the holes that you drilled and attach the back of it to make it a snug fit.


Use the paper inside the frame to measure your fabric. For this frame you could also substitute paper.


Assemble your frame! Wipe the glass off to make sure there isn't any dust or lint on it. This frame stands on its own, a wall hanging frame could also be used.


Earring Frame

Take apart your frame. Measure burlap to fit inside frame. Glue (or staple) the fabric to the inside edge of the frame. I wrapped mine around popsicle sticks to give it a nice edge and one it up straight. Window screen can be substituted for the burlap.


For a wall hanging frame you can leave off the backing to allow more space for the earring hooks. Mine is standing so I put the back on it, making sure there was an empty pace for the hooks inside.


I am very happy with how they turned out. If you make one I would love to see a picture. 
Please feel free to ask me any questions. 


Monday, December 30, 2013

2013

Review of My Year

I am very proud of my creations this year. I have learned a lot and grown as an artist. I made many mistakes, but far more accomplishments. Thank you everyone for supporting me in my art and creative expression. 

Here is a gallery of some of the pieces that I created in 2013. If the slideshow is slow please check out the whole picasa album.


I also teamed up with Kizzix Photography from Nottingham, UK to take some photos as well as shooting a few myself.


Steampunk Supplies


I am in constant search of supplies. Craft store, eBay and Etsy all have many steampunk supplies to search through and compare. There are many supplies that I have found and love at many price points. While shopping on eBay can be addicting I still love picking up and examining things in person at the craft store. 


Your Steampunk on Etsy


I recently ordered from YourSteamunk. Very awesome sale happening so I couldn't resist. Their supplies are well priced and come in many different styles. They are consistent in size and quality, which is something I wished for when the last grab bag of assorted watch parts was mostly screws, bits of glass and dust.


I am very excited about my purchase and I will update with photos soon.

2 Jan, 2014
I received my first order from MySteampunk. They are so perfect. I will post a picture of jewelry soon.


Wednesday, October 9, 2013

Featured!

CraftGossip.com


I am so excited about being featured on Craft Gossip! I have followed their site for years. They are always the first to share techniques that are trending in the online craft world. Their seasonal crafts are AMAZING as well. I highly recommend that you visit them. 


Visit Site


Saturday, October 5, 2013

Resin: Easy Cast

Videos and Tips on Working Safely with Resin


I personally work with "EasyCast" resin by Castin' Craft. It is simple to measure because it is half and half. There are other brands that use the same process. (Example: ICE Resin) 

My Tips

Work with resin in a space that is children, pet, and dust free. Cutting resin out of cat hair or sanding it off your flooring doesn't sound fun does it? If you are outside cover it with a plastic bin or shoebox to prevent bugs or dust getting in. 

I like to cover my workspace with newspaper. Layers of it. Then I wrap a piece of cardboard with wax paper and tape it on. I use that to place my (baked and cooled) clay pieces on while pouring resin. 

I use a popsicle stick to drip it onto my piece. (like in the second video) 

I wear safety glasses because I don't want a silly craft project mishap damaging my sight. (I even wear low magnifying glasses while sewing for the same reason)


Please read all of the safety information provided in the package. Do some research before starting. Use protective equipment and have adequate ventilation. You won't regret wearing an apron or safety glasses. 


Beadaholique

I am just going to share some awesome videos by Beadaholiqe. They are very clear and easy to follow.
I use a heat gun instead of a torch. She must have some crazy awesome table top to be able to torch it and not cover her workspace...

*Heat gun or hairdryer work fine. Craft heat guns are typically used for shrink wrap and embossing powders.


Another Great video on How to Apply Resin to Objects with Uneven Backs and Stamping Blanks.


Do you have any questions or need more tips? Please comment below and I will do my best.


Wednesday, July 24, 2013

Creative Process

Work Stations

Set Up...

So, I have been working on taking more pictures while I am creating and assembling jewelry. Doesn't my workspace look so tidy and organized? That is all before I begin.  (More craftroom pictures)


Beads, findings and roller skates

Workspace 1 month later

 I have so many tiny containers and bags filled with supplies strewn about my desk. On the right I have clay set out. Many orders in the works at the same time. I work well among the chaos.


Assembling the Pieces


Bead Board
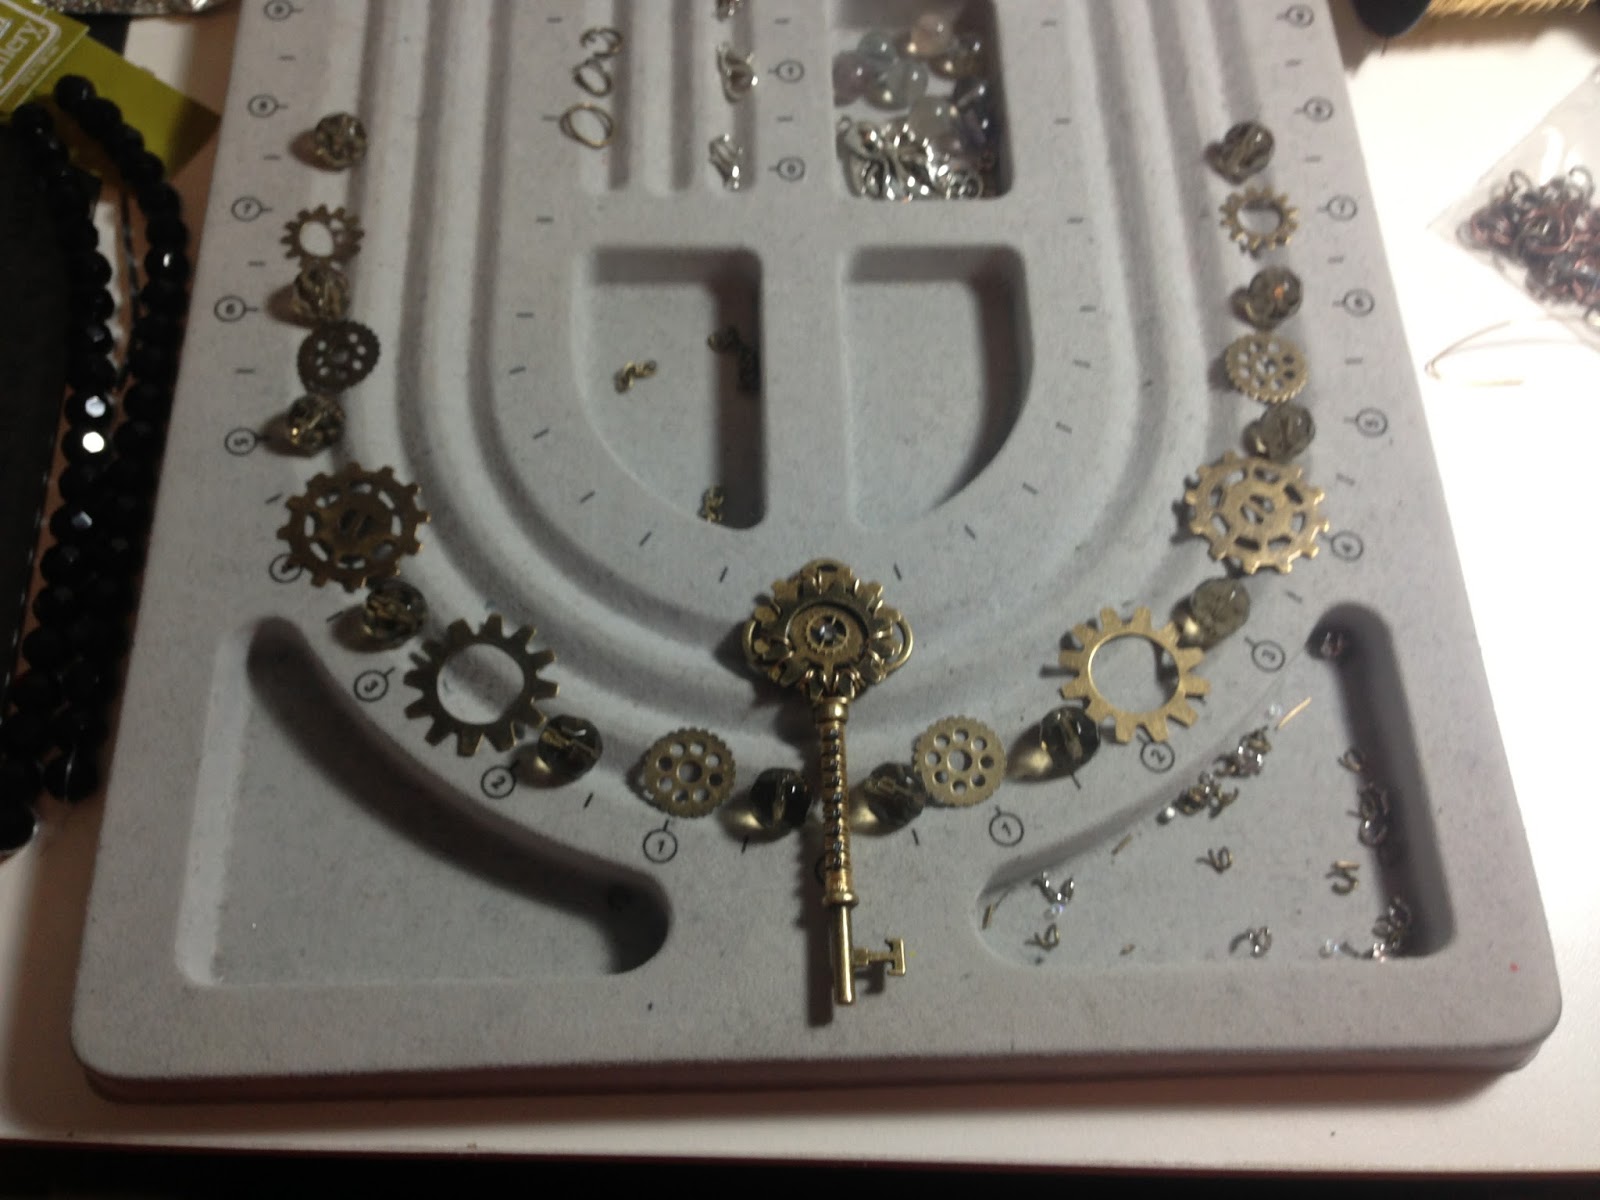
I want to fill you in on my process. I make my custom pendants, sometimes keys and altered bits or polymer clay, then I lay them out with beads and charms in different patterns on my board. It is a flocked board with 3 rows and a measuring guide. I like it because I can see the finished piece before putting it together. I can move and change it easily. Once I am happy I put it all together.


Finished Antique Key Necklace


Polymer Clay Pendants


I am working on a full list of basic tutorials and I will hopefully share some finished ones soon. Polymer clay is a fun and easy medium to work with. It is easily available and even children can make things then an adult can bake it. There are different brands and types available. I use mostly Premo Sculpy or Sculpy III. I find its more rigid than other types and best for my style of jewelry. Play around with different ones and pick a favourite. 


Embellish

I roll out my clay with a pasta machine. Tools can't be used for food once its been used for clay. Knives, cookie cutters, rollers and pans included. Some people even have a clay dedicated toaster oven, I don't have the space now but in the future I will do this. 

Once the clay is rolled out I add texture with many tools and stamps. Play around, its fun. Then I add mica powder, metal leaf or glitter. I also add other flat embellishments. Make sure these are bake-able! If not then bake it plain, following the package instructions and add them after its baked and cooled.


Resin
I use epoxy resin to seal my pendants. For beginners I recommend Triple Thick Glaze instead. For resin the area needs to be kid free, well ventilated and controlled temperature and low humidity. Its not easy to clean up and everything it touches should be able to be thrown out. I typically use 2 or 3 layers poured slowly. There are great you-tube videos on this, please do research before using resin.


Almost Finished
Once the resin is cured I add a bail and work on a necklace. Usually a simple chain is easiest to wear, but statement pieces are more fun to make. ;) After consulting a fellow artist I added a ribbon to it. Ask opinions of those that will be honest. A fresh set of eyes really helps.


Time Traveller's Dream

This necklace is available in my Etsy shop. 


I have many more pieces in progress and I will post again soon! I love making custom pieces, fell free to message me with questions and requests.